Pages

Pages

Pages

Wednesday, July 1, 2020

Bonus Days!

Summer is all about fun and relaxation! As a kid it was for swimming, playing with friends and bike riding. I do some of these same things as an adult but I also craft! When I need crafting supplies I love to find a bargin or get something extra, don't you?!

Stampin' Up! is bringing back one of my favorite promotions! Bonus Days!! Have you participated in Bonus Days before? It is a great wy to get quality craft supplies now and have a bonus to use in August!!

Here's how it works. During the month of July for each $50 you spend (before tax and shipping) you earn a coupon code to redeem in August! This is perfect timing as the new fall mini catalog (previously called the Holiday Catalog) will debut in August. So you can get those items from your annual catalog shopping list, stock up on envelopes and adhesive, or add a new tool or two to make crafting easier and then next month use your coupon codes to save on items for your fall and winter craft projects!!

 Frequently Asked Questions:

Q: Are the coupon codes case sensitive?
A: No, but the codes will include a dash. You must include the dash in the code for them to work.
Q: Can participants earn multiple codes on a single order?
A: Yes. There is no limit to the number of codes that can be earned on a single order. The order must simply reach the qualifying amounts to do so.
Q: Can I use my coupon codes after 31 August 2020?
A: No. All codes will expire after 31 August 2020.
Q: Will my Stampin' Rewards overage or 50% off items count toward the qualifying sales amount?
A: No. Stampin' Rewards overage and 50% off items will not count toward the qualifying amount.
Q: What if participants earn coupon codes but don’t receive an email?
A: With so many different email providers, it’s possible that the email may have been sent to a spam folder. Check there first, and if the email still can’t be found, please contact Demonstrator Support at 1-800-STAMPUP for help.
Q: Will participants be allowed to apply coupons valued at more than the amount of product they’ve ordered?
A: Yes, but they will forfeit the overage of the coupons being applied.
Q: What if a participant doesn’t have an email address?
A: An email address is required to generate a code, so anyone who wants to participate in the promotion must provide one. A friend or demonstrator could offer to provide their own email address so that they receive the coupon code(s) on behalf of the customer and then give the code to their customers.
Let me know if you have further questions. 
Happy Shopping!

Tuesday, May 7, 2019

Layers on Cards

Have you struggled with layering cards? Do you sometimes feel like you waste card stock trying to get the layers to look the way you want? I did that too! After 17 years of card making some of the layer sizes are now stuck (probably forever!) in my brain. So let me share some tips for cutting with you!

The Stampin' Up! card stock comes in 2 sizes 8 1/2x11 and 12x12 inches. The 8 1/2 x 11 is usually what I use for a basic card. It can be cut easily in half to create a basic card. It can be cut vertically to create two (2) 4 1/4 x 11 pieces or horizontally to create two (2) 5 1/2 x 8 1/2 pieces. Either of these folds in half to create a 4 1/4 x 5 1/2 card.

Once you have your card base then you want to add the layers! Some people like very thin mats on their layers and measure in 1/8ths of an inch. I very rarely do this as it feels more difficult and doesn't usually change the view/look a lot. I generally cut mats that are a 1/4 inch smaller than the previous layer which when centered leaves a very nice 1/8th inch all the way around. You can get four (4) 4" x 5 1/4" layers from one sheet of card stock. The card stock is cut 1/4" smaller in each direction. 


If you choose to use foil paper or even card stock you can die cut or punch something from the center to use later if you plan to cover this layer with another layer of card stock. I do this frequently to save paper or to decrease the weight of the card.

The next layer is cut a quarter inch smaller than the previous layer or a half inch smaller than the card base (front). It will be 5" x 3 3/4". If you are planning to add some designer series paper to your card this is a great way to bring in 2 colors from the Designer Series Paper. You could add 4 pieces of Designer Series Paper or a strip down one side. These are easy layouts that work well for lots of card types/occasions.

I do hope this was helpful to you. You may want to cut a piece of copy  paper to these measurements to use as reminders when you are creating cards. You can line them up to see how something might look before cutting card stock!


Tuesday, February 26, 2019

Kissing Technique


Kissing is a technique that I remember from my early stamping days. Back then we used a solid
stamp and now we can use our acrylic blocks. Inking up a textured stamp, especially one of the large background stamps and transferring the ink to the block allows you to use it in a variety of ways.

I inked up the Burlap Background in Soft Seafoam ink. After inking the stamp I pressed the acrylic block onto the background stamp.

Next, I pressed the block onto the card stock. Transferring the ink from the block to the card stock.

After lifting the block from the card stock and cleaning it, I finished adding images and finished the card.

This is another example of a card I created using this technique.


Thursday, January 17, 2019

Written On Your Heart Event

THANK YOU!!

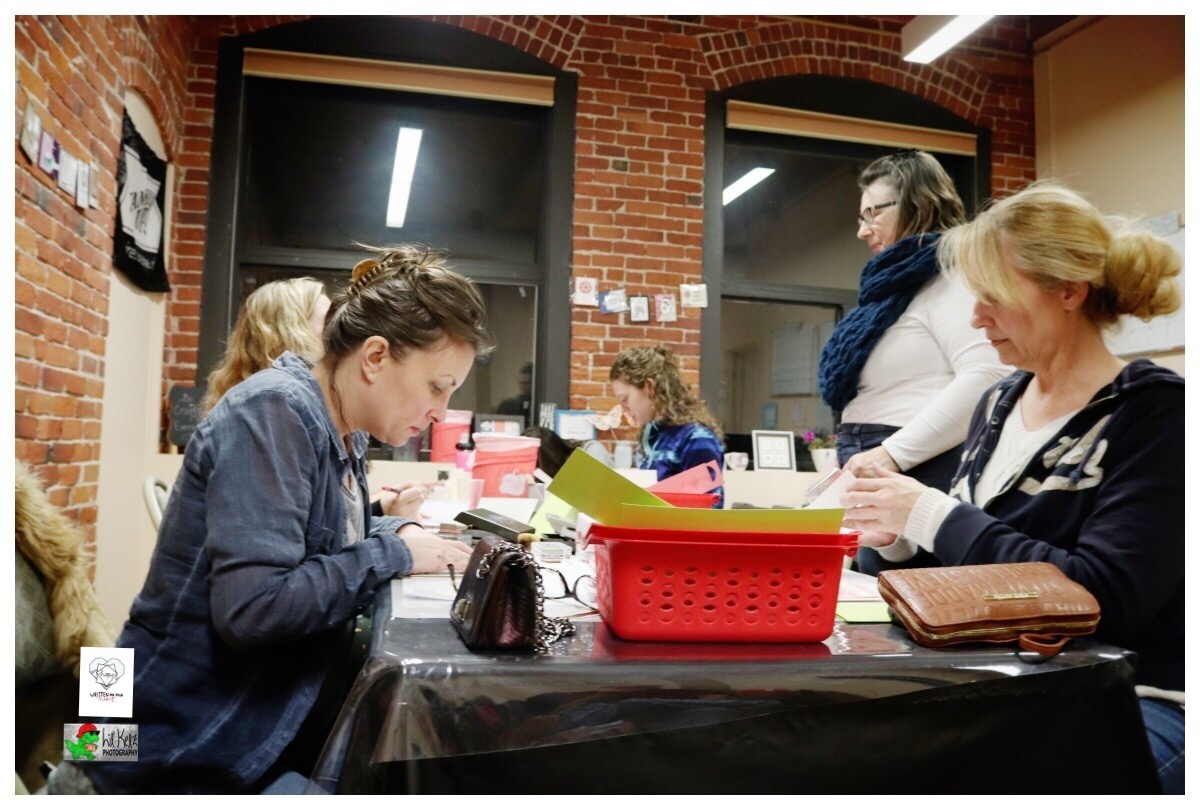
I would like to personally thank each and every person that stopped by the studio to make a card during the Written On Your Heart event on January 4th! Since that is not exactly possible (although I tried to speak to everyone at the event and express my gratitude), I will say it now as part of this public expression of my gratitude! Thank you so much! Written On Your Heart, Kelly and I all appreciate the time you took to come to the studio and create cards for survivors of human trafficking!! 

Here are a few stats from the event:

  • more than 20 people stopped by to create cards!
  • 70 cards were created and donated!
  • Over $80 were collected as donations for postage and other expenses!!


So once again THANK YOU for helping a very worthy cause! 


Wednesday, January 16, 2019

Easy, Fun technique

This is an easy, fun technique to try with your embossing folders!


Choose your embossing folder and card stock.  I chose this one as I was working on a masculine card and had an idea for using the debossed (indented side of the card stock).


Use your Big Shot to emboss the card stock. I chose Smokey Slate to enhance the masculine theme I was working on as well as the Designer Series Paper I planned to use.

When I removed the cardstock this is the embossed (raised) side of the card stock.  I flipped it over to the debossed side so that the main design is pressed into the card stock. 

I then ran my Basic Gray ink pad very LIGHTLY across the card stock trying to just touch the raised parts. This revealed the outline of the hexagon shapes.  To me they look like the nuts that screw onto a bolt!

This is the card beginning to take shape. You can see how well the Designer Series Paper works with the embossed card stock! 


Cling Stamps

Have you had problems with the clear-mount stamps falling off the acrylic blocks?

Were you confused by the name clear-mount when they were not clear stamps but red rubber?

You are not alone!!

Stampin' Up! has been having these issues and concerns reported for sometime. They have been working hard to come up with a good solution! CLING STAMPS are here!!!

Beginning with the Occasions Catalog (products available Jan. 3rd - June 3rd while supplies last) the red rubber stamps that attach temporarily to the clear acrylic blocks are referred to as Cling Stamps. These stamps give you the fabulous, crisp image you have come to expect from Stampin' Up!'s red rubber stamps while clinging well to our wonderful, ergonomic acrylic blocks!

These stamps stick so well that Stampin' Up! even created a video about how to apply the labels and how to remove them from your acrylic blocks with out damaging your stamps. Click here to watch the video.

If you have questions or concerns please call or email me!! I am always happy to help!

Saturday, November 17, 2018

My trip to On Stage


I enjoy going to Stampin' Up! events for lots of reasons! I love catching up with old friends and meeting new ones, seeing fabulous new product demonstrations, and learning business strategies and techniques that will help me build my business!


I was fortunate to attend the 3 day live On Stage event in Orlando, FL earlier this month. I took my husband, Richard and we made it into a week long vacation. My mother was also able to join me at this, her first Stampin' Up! event. A good friend was able to join us for the event as well! So much fun!!

Wednesday was check-in day. We went to the convention center and found our way to the check-in area. While we were there getting our bags, nametags and Prize Patrol badges we got to do a bit of swapping! Swapping allows me to get lots of great samples for the studio and ideas for classes as well. We went to Epcot as part of my Centre Stage reward. Loved seeing Soaring and had fun at Test Track.

Thursday was our first day of actual stamp presentations and business information. Everyone got a prize patrol button. When your number was called you got that prize. My friend, Janis, got Strong& Beautiful for hers, I got Well Said
and Mom got Janet Wakeland's set Artfully Aware. There were lots of all attendee giveaways as well. We got stamp sets, Designer Series Paper, and a great little toolkit.

On Saturday morning I was able to walk across the stage to celebrate my 200K Career Sales Milestone. I want to thank all of you that helped me reach this tremendous milestone! When I made this goal public and started tracking my progress you all stepped up and got me to my goal!! I so appreciate each and everyone of you that has supported my business over the years!! Walking the stage was every bit as wonderful as I anticipated! I felt especially happy that my mom could be there with me!


I am already looking forward to going to Atlantic City, NJ for the next one in April. If you join my team you can come too!!

Sunday, October 21, 2018

Limited time Products Coming November 1st!

Hello! 

Stampin' Up! is offering a Limited Time/While Supplies Last group of products for the month of November. There are 2 stamp sets, a set of framelits, snowflake embellishments and white velvet paper.   The products are only available separately and not as a bundle. Click here to email me your preorder. Placing a pre-order will help make sure you get the products without worrying about having products sell out.
I will be taking pre-orders for these products from October 24th to October 31st. I will be placing an order on November 1st first thing in the morning. 


Snow is Glistening Stamp Set $21

Snowfall Thinlits ($39 (20 pieces)

Snowflake Trinkets (10 each style) $8

This one uses the lovely swish of snowflakes die as well as 
several of the other snowflakes.

A very pretty snowflake holiday card

Not just for snowflakes!


Wednesday, October 10, 2018

Snowflake Showcase

Keeping up with all this social media stuff can be a challenge. It is one I am trying to embrace and enjoy. I get to share all kinds of fun stuff with you!
One of the fun things is my 12 weeks of Christmas e-mails. I have scheduled the first five weeks of e-mails already. There are 4 more gorgeous card ideas waiting to land in your inbox!! The next one goes out today at one o'clock. Be sure you have signed up to get them!

So Stampin' Up! is offering a limited time set of products in November. The Snowflake Showcase includes 2 stamp sets, a set of framelits, white velvet paper and beautiful snowflake embellishments!
Check out the video below to see a preview of these pretty products!


Thanks for stopping by! More soon!

Sunday, September 30, 2018

12 Weeks of Christmas is coming

This year I am going to be sending a Santa's Helper e-mail campaign. During this campaign I will be sharing one new holiday project each week during the 12 weeks leading up to Christmas. The only way to see these projects is be on my e-mail list. If you already are then yippee! Be ready to be wowed! If you aren't you can click here and you can sign up to receive my emails. Be sure you so before Wednesday, October 3rd so that you don't miss out on any of the great projects!

Wednesday, July 18, 2018

Paper Pumpkin 50% Off!!!

I love getting my orange box in the mail each month! The kit is always a surprise and always fun! I love to just open up the box and see what is in it!!  Even if the project is not exactly one I love instantly I always find some great ideas about how others are using the kit! Check out this fun video!

Each kit includes a color photo of the project, step-by-step photo directions, a Stampin' Spot (small stamp pad), and an exclusive stamp set that you can't get anywhere else! These fabulous kits are like a class at the studio delivered right to your mail box! The only thing missing is me (because I won't fit in the box!).

Right now Stampin' Up! is offering a special to first time subscribers! You can get your first month at 50% off when you join before August 10th. There is a Promo Code you need to enter in the box in order to get the first month discounted. You will need to enter BLOOM0818.
https://youtu.be/Gf6YwWgSnYI
Click here to see video on how to sign up

You can skip the video and follow these steps if you prefer:

1. Go to paperpumpkin.com and click Subscribe Now.
2. Enter your general information plus shipping and payment information.
3. Under Order Summary, enter the number of kits you’d like to receive each month.
4. Enter your promotion code or a prepaid subscription code (if applicable). Click here for instructions on how to redeem a prepaid code.
5. Click Subscribe. You will receive a congratulations message with a note letting you know when your first kit will ship.
6. You are now a subscriber! Visit your account page at any time to edit details including payment information and number of kits you’d like to receive; to do this, simply go to paperpumpkin.com and click the login button in the top right corner. To watch a video about managing and updating account information, click here.
Last month's kit was themed to coordinate with the Broadway Bound suite in the current catalog.
Check out Paper Pumpkin and get your subscription started today!


Tuesday, July 10, 2018

Designer Series Paper Sale


Admit it: you just love gorgeous Designer Series Paper  By popular demand, we are bringing back an incredible offer on Designer Series Paper: You can buy three packages of select Designer Series Paper and get one FREE during July! This sale includes select Designer Series Paper from the annual catalog (see list below). So take advantage of this excellent opportunity to get lots and lots of pretty paper! Click here to see the list. This is a great opportunity to get these beautiful papers at a terrific price ($8.25 /pack before S/H).

  • Dates: July 1-31, 2018

  • Only Designer Series Papers listed in the table below qualify for this promotion. You may mix and match papers from any of the listed papers.

  • There are no ordering limits on this promotion.

  • All order types qualify for this promotion: customer, demonstrator, workshop, online.

  • Designer Series Paper ordered with Stampin’ Rewards is not eligible for the promotion.

  • This promotion does not apply to starter kits.

In the online store, if a customer orders four packages of the same qualifying Designer Series Paper, they will need to enter three together and then order the fourth free item separately.

Thursday, June 28, 2018

Stampin' Blends are Here!!

Yippee!! The Stampin' Blends NEW Colors are HERE!!! I ordered all 11 colors today! I LOVE these alcohol markers as they make everyone look like an artist!! I offered a club (monthly buy) when the original colors were introduced earlier this year. I am planning to offer 2 separate clubs both beginning in July. the first will be for those people who only need the 11 new colors and the second will go for a few extra months for those needing all of the Blends.

The Stampin' Blends are available in 22 exclusive Stampin' Up! colors. I have spent time coloring with these markers and found them to be VERY easy to use! They can make anyone color like an artist!! They are so much fun and so easy to use. I will be offering a “how-to” at the studio very soon.
If you invest in the entire set of Stampin' Blends, including the Ivory, Bronze and Color Lifter, it will cost $211.50 plus S/H. I offered a club for the original set of 27 markers when they were introduced earlier this year. It made getting the markers much more affordable and several people took advantage of the opportunity. I am going to offer 2 different blends clubs as soon as they are orderable in mid-June. I will offer one club for all 22 colors plus the ivory, bronze and color lifter markers. I will also offer a club for just the 11 new colors.
When you join the 22 color club you will receive 3 sets of the Stampin' Blends for 2 months along with the 3 single markers (bronze, ivory and color lifter) and 4 sets of markers for 4 months. (July thru November). Payments can be made by check or credit card. If you choose to pay by check, I have to have your check by the 4th of each month. The monthly cost will be $45 and will include several additional items during the club months. Additional items will include a Memento Black ink pad,4 stamp cases for storage, and a stamp set.
Month 1 You will receive 3 sets of Stampin' Blends markers, the Momento Black ink pad and the Color Lifter Marker. Month 2 You will receive 3 sets of Stampin' Blends markers, 2 stamping cases to store your Stampin' Blends markers in, and the Bronze and Ivory markers. Month 3 You will receive 4 sets of the Stampin' Blends markers, and a sampling of embellishments to color with the Blends. Month 4 You will receive 4 sets of the Stampin' Blends markers and a sampling of ribbons to color with the Blends. Month 5 You will receive 4 sets of the Stampin' Blends markers, and 2 more cases for your markers. Month 6 You will receive your final 4 sets of the Stampin' Blends markers and either the Springtime Stroll or Hand Delivered stamp set (choice made at the start of the club with a value of $12).
The 4 month long, 11 new color club will include the 11 new colors of Blends (duos) 2 cases to hold your markers and either the Sitting Here or Heartland stamp set valued at $17.00. The first 3 months will have 3 colors each. Month 2 will include your 2 cases and Month 4 will have 2 colors and your stamp set. (July- October). The monthly cost will be $32 payable by credit card or check. If you are paying by check I will need the payment by the 4th of each month.

Tuesday, June 26, 2018

Busy Day Today!

So today I met with Stacey Nachajski of Great Brook Marketing. This was our second consultation and she helped me get lots of awesome online work done! I now have 
an Instagram account that is linked to my facebook business page and is helping people 
find and join my private group! Check it out at https://www.instagram.com/luvinkandpaper/

My private Facebook group is called Leslie's Stampin' Pals and will feature samples and tips as 
well as information about classes and events. If I have VIP only information that is where I will 
put it. Right now the VIP Studio Sale hours are posted there. 

I worked on packaging and pricing paper today. I have lots of unopened packages of 81/2" x 11"
card stock as well as many partial packages of the recently retired colors. Yesterday I priced 
many stamp sets. I have marked them all at 30% of the catalog price. That is less than I paid 
for them and is actually a 40% discount since there is no shipping! Be sure to arrive early for the 
best selection!

Tomorrow I will move a few more tables and pick up things that are not for sale....Big Shots
 and accessories!! Someone saw one of my Big Shots in the background of a photo today 
and asked if it was for sale. No, I often wish I had a third during some classes!

 So did you lose power during last Monday's storm? There was power at the studio but not the 
house so Rich and I took an air mattress and his c-pap and camped out at the studio. It was 
not the best night's sleep I've ever had but way better than at home with no lights, fans, or 

cpap for Rich!! 
I am working to get more consistent with this blog. If you have ideas for things you would like to see here please let me know! Until next time...